Publisher Tutorial: Creating a double opt-in for new profiles
According to the law you are not allowed to drive through a red traffic light, but you are also not allowed to send commercial email to people who did not register for it. Such a registration is dubbed an "opt-in" in the internet marketing world. When you unsubscribe this is called an "opt-out". A double opt-in asks the user to confirm their email so you can guarantee your users registered a valid email address, which also improves your deliverability.
Note: This is an older tutorial aimed at Publisher users. If you use Marketing Suite you should use this tutorial instead.
How does it work?
A new user would like to receive a periodic newsletter. They register with an email address. An automatic mail is sent to the user with a link they have to click to confirm their registration. The registration is completed on clicking the link, before that time the user will not receive any of your mailings.
The double optin has a few important advantages compared to the simple optin:
- The person registering for the mailings is the same person as the one that receives them.
- The address you send your mail to is guaranteed to be valid, reducing the amount of errors when sending a mailing.
- Because there are less errors your deliverability is better.
- The database is cleaner, because it only contains people who can and want to receive your newsletters.
Configuring a double optin
- A new users registers with your registration form.
- When the form is sent an automatic mail is sent to the user containing the confirmation link. This will be accomplished with a follow-up link.
- When this link is clicked the subscription is confirmed.
- Optionally send another confirmation mail with information about how to unsubscribe and some interesting product on your website.
Requirements
- You will need a database with a multiple choice field for newsletter preference and a field for the email address of the profile.
- Three web pages:
- Registration page (1)
- Registration completion page where you inform the user about the email they have received. (2)
- The page the user will be sent to after completing registration by clicking the link. You can include some useful information, tips or products too! (3)
- An email document to send to contain the hyperlink.
Step 1: Preparing the database
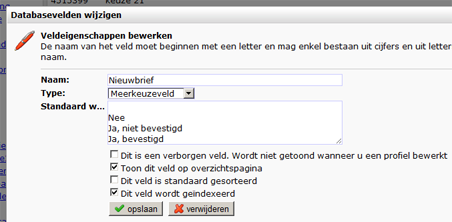
Your database needs at least a field containing the profile's email and a newsletter preference field. Please note that there is a special type for the e-mail field that should be user in order for our system to recognize it.
The field for newsletter preference should contain at least the following options:
- [empty option]
- No
- Yes, unconfirmed
- Yes, confirmed
You may also provide the user with the option to choose how often they want to receive a letter. In that case you should add more options to your registration form and update this field accordingly.
Step 2: Prepare your webpages
Create your webpages so you can display the registration form and inform your clients.
Step 3. Preparing the form
In this step we create the registration form with two fields:
- A text field linked to the email in the database.
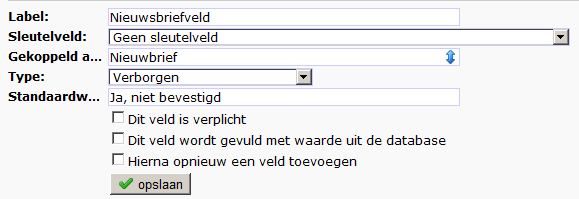
- An invisible field that is linked to the field with the newsletter preference. By default it is set to "Yes, unconfirmed" when the user sends the form.
Note: Since the automatic email should be sent to the user of the form you should use the "Login as profile from database" setting that you can find under the form settings.
Now place the form on the first webpage you made and make the following page
the notice that the automatic email was sent. You can display their email
address with {$emailaddress}.
Step 4: Configure a followup action to the form.
When the form is completed and sent a confirmation mail should arrive in the users mailbox. We accomplish this with a followup action.
Go to the Follow-ups option in the webform menu and make a new followup that sends the email to the profile. Select the email document with the confirmation link.
Step 5: Create the confirmation mail
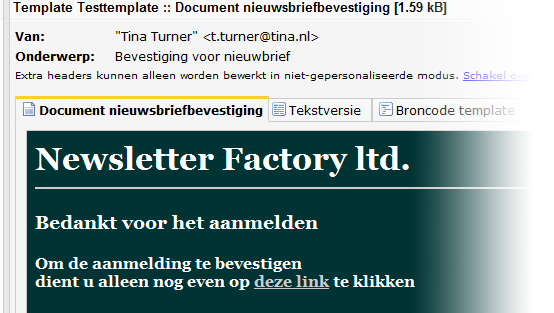
Create a new mail document or edit an existing document. The most important thing is to add a hyperlink that refers to the "registration complete" webpage. We are now adding a followup to the hyperlink.
Go to the document menu and click on Follow-ups. Add a new followup and set it to change a field in the database. This value should be "Yes, confirmed" for the newsletter preference field.
Save the followup action. When the new user clicks the hyperlink their information the database will change and they will start to receive newsletters from you.
Create a newsletter selection
In this step we will create a new selection to email only the profiles in our database that registered to receive mail. You can make a new selection under Profiles > Database management > Edit selections. Enter a name and a description and select "Check on field". Pick the newsletter preference field for the field option and enter the value "Yes, confirmed". You should then send your emails only to the selection you have created.

